Monday 28 March 2011

How to make Crafty Curtains for your home

Patience is a virtue. Never more so than when making curtains.
First thing's first, get some space. Floor, table, wherever you can find it - the more flat space you have at your finger tips, the easier it will be.

What you'll need:
  • Curtain material (see how much you'll need below)
  • Lining material
  • Sewing machine
  • Curtain tape (I used this one. The longer your curtains, the thicker your tape should be. Up to 2m drop = 2" tape. Up to 3m drop = 3" tape, and so on)
  • Thread - similar colour to curtain material
Helpful:
  • Tailors chalk
  • An iron


Each curtain will be the length of your window + 20cm x the width of your window +5cm.
Here's how to work out how much material you'll need:


Lay lining material out, right side up.
Pin your curtain tape along the top of the lining, 7.5cm down.
Lay your curtain material on top of it, right side down and pin all layers in place.
Sew 2.5cm around both lengths and the top of the fabric.
Repeat with second curtain.

Turn inside out (to right side) and iron flat.
Sew top and bottom lengths of tape through both lining and curtain material - in order to avoid wrinkles, sew both in same direction:


Gather the tape on one end so curtain is half the width it was (half the width of your window):


Slip hooks through the tape at even points about 8cm apart and hang:


Once your curtains have hung in place for a good 4 weeks, hem by12.5cm and re-hang

How to make lovely squashy cushion covers

I vaguely remember making cushion covers while in Home Economics class at my very ancient all girls grammar school.

It was all frills and lace, tucks and turns back then.

But it really need not be that complicated. Here's a simple piping/zip cushion which you only need to be able to master a sewing machine to make...

Here's what you'll need:
  • A sewing machine
  • A cushion (mine's 50cm x 50cm)
  • Piping (4 x the width of your cushion + 10cm - so 210cm for me)
  • Material 2 x (width + 5cm squared = 55cm)
  • plus length of 5.5cm fabric cut on the bias for piping
  • Dressmaking scissors
  • Thread of similar colour to fabric
  • Lots of pins
  • Zip of similar colour to fabric
  • Tailor's chalk


Get everything you need ready - it makes life 100% easier.
Take your 210cm length of bias cut 5.5cm wide fabric and fold in half (so it's just as long but 2.25cm wide)
Slip your piping into the crease and sew firmly into place.

Take your two squares of fabric which will form the front and rear of your cushion cover.
Cut the piece of fabric which will form the rear of the cushion in half.
Pin the zip and one half of fabric together - front sides facing each other - then sew:

Do the same to the other half of the rear fabric so the zip is sewn into the the middle of the square of fabric.
Lay the rear square of fabric on the floor - right side facing up.
Take the length of piping and lay it around the 4 sides of the cushion - piping pointing inwards:


Take the front side square of fabric and lay it right side facing down
Pin all 3 layers firmly in place.
Sew all 4 sides together 2.5 cm from the edge.
Open the zip and flip inside out . Insert cushion.
Here's what you should have!:

Sunday 27 March 2011

Snowflake hot water bottle cover

A great gift for mother's day, this hot water bottle cover is a real winner. It's pretty simple - if you don't fancy trying the snowflake you can just keep it plain both sides instead.

You will need:

  • Red and white double knit yarn

  • 4mm knitting needles
For the back:

Cast on 51st (red)

Stocking stitch for 30cm

K1, P1, K1, P1... etc for 7.5cm

Cast off loosely.

For the front:
Cast on 51st Stocking stitch for 35 rows


36: K14 red, K1 white (w), K1 red (r), K1 w, K4 r, K1w, K5 r, K1 w, K5 r, K1 w, K1 r, K1w, K14 r
37: P15 r, P2 w, P4 r, P1 w, P1 r, P1 w, P3 r ,P1 w, P1 r, P1 w, P4 r, P2 w, P15 r
38: K14 r, K3 w, K1 r, K1 w, K2 r, K1 w, K7 r, K1 w, K2 r, K1 w, K1 r, K3 w, K15 r
39: P17 r, P2 w, P2 r, P2 w, P5 r, P2 w, P2 r, P2 w, P17
40: K16 r, K3 w, K2 r, K3 w, K3 r, K3 w, K2 r, K3 w, K16 r
41: P19 r, P1 w, P1 r, P4 w, P1 r, P4 w, P1 r, P1 w, P19 r
42: K20 r, K1 w, K1 r, K3 w, K1 r, K3 w, K1 r, K1 w, K20 r
43: P15 r, P5 w, P1 r, P1 w, P1 r, P2 w, P1 r, P2 w, P1 r, P1 w, P1 r, P 5 w, P15 r
44: K14 r, K1 w, K2 r, K4 w, K1 r, K1 w, K1 r, K1 w, K1 r, K1 w, K 1 r, K1 w, K1 r, K4 w, K 2 r, K1 w, K14 r
45: P15 r, P1 w, P2 r, P4 w, P 1 r, P1 w, P3 r, P1 w, P1 r, P4 w, P2 r, P1 w, P15 r
46: K19 r, K4 w, K1 r, K1 w, K1 r, K1 w, K1 r, K4 w, K 19 r
47: P25 r, P1 r, P25 r
48: K19 r, K4 w, K1 r, K1 w, K1 r, K1 w, K1 r, K4 w, K 19 r
49: P15 r, P1 w, P2 r, P4 w, P 1 r, P1 w, P3 r, P1 w, P1 r, P4 w, P2 r, P1 w, P15 r
50: K14 r, K1 w, K2 r, K4 w, K1 r, K1 w, K1 r, K1 w, K1 r, K1 w, K 1 r, K1 w, K1 r, K4 w, K 2 r, K1 w, K14 r
51: P15 r, P5 w, P1 r, P1 w, P1 r, P2 w, P1 r, P2 w, P1 r, P1 w, P1 r, P 5 w, P15 r
52: K20 r, K1 w, K1 r, K3 w, K1 r, K3 w, K1 r, K1 w, K20 r
53: P19 r, P1 w, P1 r, P4 w, P1 r, P4 w, P1 r, P1 w, P19 r
54: K16 r, K3 w, K2 r, K3 w, K3 r, K3 w, K2 r, K3 w, K16 r
55: P17 r, P2 w, P2 r, P2 w, P5 r, P2 w, P2 r, P2 w, P17
56: K14 r, K3 w, K1 r, K1 w, K2 r, K1 w, K7 r, K1 w, K2 r, K1 w, K1 r, K3 w, K15 r
57: P15 r, P2 w, P4 r, P1 w, P1 r, P1 w, P3 r ,P1 w, P1 r, P1 w, P4 r, P2 w, P15 r
58: K14 r, K1 w, K1 r, K1 w, K4 r, K1w, K5 r, K1 w, K5 r, K1 w, K1 r, K1w, K14 r

Continue work in stocking stitch (red) until it reaches 30cm
Then K1, P1, K1, P1 etc for 7.5cm
Cast off loosely.

Arrange knitting right sides facing in. Stitch 2 lengths and bottom sides together. Now turn the right way round and stitch white yarn through the neck of the hot water bottle cover. Voila!

Prussia Cove Sandy Lamp

Here's a lovely little trick I learned from family holidays to an estate in south Cornwall. They used wine bottles but you can use any type of bottle - here I've used an old olive oil bottle.

What you'll need:

  • An old bottle

  • Sand from your favourite beach

  • A small lampshade A bulb (60watt)

  • A bottle lamp holder adaptor (I used this one)
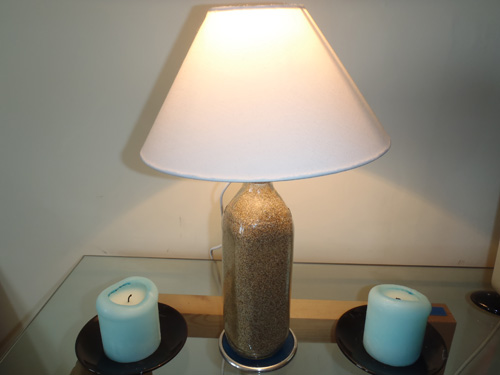
First thing's first - get the sand into the bottle. By hook or crook. If you're brighter than me you'll use a funnel... Bang the bottom of the bottle on a hard surface a couple of times while filing to shift the sand down into it: Next, attach the lightshade and lightbulb to the adaptor:


Hey presto: plug it in and switch it on!

The Craft Homemaker

Recessions are a good enough reason to dust off the sewing scissors and set to work designing and creating your own masterpieces at home.

I admit to being the seamstress for our school fashion show 15 years ago - largely because I was the only one who could work a sewing machine. From there I went to art college and painting took over. I never really sewed again.

Here I am at 30, cautiously dipping my toes back into the lost crafts of homemaking - knitting, sewing and upholstering, among other things.

It's nice. It means I get to furnish my home with bespoke curtains, lamps and cushions and I don't have to pay the ends of the earth to do so.

Enjoy x